
Introduction
Few baked goods evoke the same warmth and nostalgia as homemade chocolate chip cookies. These delightful treats have been a staple in many households for generations, offering a perfect balance of sweetness, chewiness, and chocolatey richness. The mere thought of biting into a freshly baked cookie, warm from the oven with melted chocolate chips, is enough to bring a smile to anyone’s face.
The importance of homemade cookies extends beyond mere taste; they play a vital role in creating memorable experiences. Whether it’s a family gathering, a festive holiday, or simply a quiet afternoon, baking cookies brings people together. The aroma that fills your kitchen as the cookies bake not only tempts your taste buds but also creates a comforting atmosphere that invites friends and family to join in the fun.
Baking from scratch is a rewarding endeavor that allows you to control each ingredient and customize your cookies to perfection. When you make chocolate chip cookies at home, you experience the satisfaction of transforming simple ingredients into something extraordinary. Let’s dive into the essentials of making the perfect chocolate chip cookie, starting with an understanding of the ingredients.
Understanding the Ingredients
Essential Ingredients for Chocolate Chip Cookies
To embark on your cookie-making journey, it’s crucial to understand the role of each ingredient in achieving the perfect cookie.
1. Flour: Flour is the backbone of your cookie dough, playing a key role in determining its texture. All-purpose flour is the most common choice for chocolate chip cookies, providing the right structure and chewiness. Too much flour can lead to dry cookies, while too little might result in a spread-out, flat cookie.
2. Butter: The type of butter you use can significantly impact the flavor and texture of your cookies. Salted butter adds a touch of savory contrast to the sweetness, while unsalted butter allows for greater control over the final saltiness of the dough. Browning the butter before adding it to the dough will deepen the flavor, giving your cookies a nutty, rich taste.
3. Sugar Varieties: Sugar not only sweetens your cookies but also affects their texture. Brown sugar, with its molasses content, contributes moisture and chewiness, while granulated sugar helps create a crisp exterior. A combination of both sugars often yields the best results, giving you that delightful contrast between crispy and chewy.
4. Eggs: Eggs act as a binding agent in cookie dough, providing moisture and helping the cookies rise. The fat in the yolk adds richness, while the egg white contributes to the structure. Most recipes call for one large egg, but depending on your desired texture, you might adjust the number or even use egg substitutes.
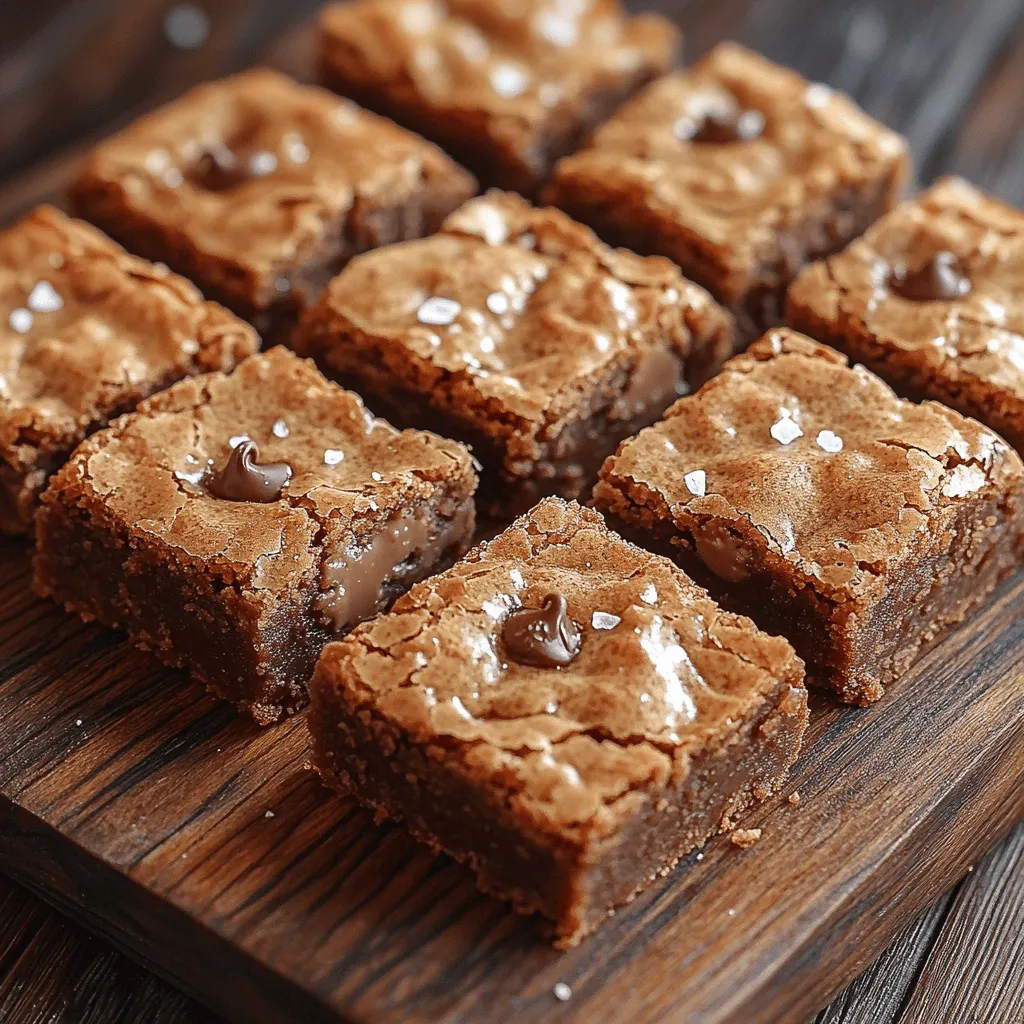
5. Chocolate Chips: Choosing the right chocolate chips can elevate your cookies from good to extraordinary. Semi-sweet chocolate chips are the classic choice, providing a balanced sweetness. Dark chocolate chips offer a more intense flavor, while milk chocolate chips provide a creamier sweetness. Feel free to mix and match or use chunks for a more rustic look.
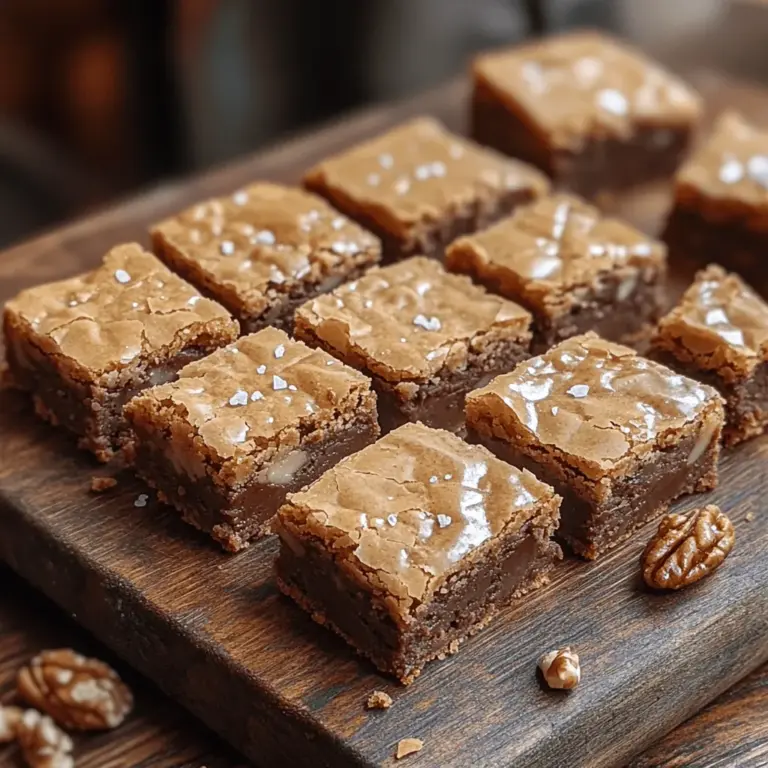
6. Optional Add-ins: While chocolate chips are the star of the show, consider adding nuts, oats, or a sprinkle of sea salt on top for an extra layer of flavor. Walnuts or pecans can add a delightful crunch, while oats provide a wholesome texture.
Preparation: Setting Up for Success
Before you dive into the baking process, setting up your kitchen for success is essential. Here are the steps to ensure your baking experience is smooth and enjoyable:
1. Measuring Ingredients Accurately: Precision is key in baking. Use measuring cups for dry ingredients and liquid measuring cups for wet ingredients. Level off dry ingredients with a straight edge for the most accurate measurement. A kitchen scale can also be a valuable tool for ensuring consistency, particularly for flour.
2. Recommended Kitchen Tools and Equipment: Having the right tools on hand can make a world of difference. Essential items include:
– Mixing bowls: A set of various sizes for mixing your ingredients.
– Hand mixer or stand mixer: For creaming butter and sugar effortlessly.
– Spatula: A silicone or rubber spatula is ideal for folding and scraping.
– Baking sheets: Choose heavy-duty, non-stick sheets for even baking.
– Parchment paper or silicone baking mats: These help prevent sticking and promote even browning.
3. Prepping the Kitchen: A clean and organized workspace makes baking more enjoyable. Clear off your countertops, gather your ingredients, and ensure you have everything ready before starting. This will help you focus on the baking process without distraction.
4. Ingredient Temperature: The temperature of your ingredients can affect the final outcome of your cookies. Cold butter can be difficult to cream, while room temperature butter mixes more easily with sugar. Aim to have your butter softened (but not melted) for optimal mixing. Eggs should also be at room temperature to blend seamlessly into the dough.
The Step-by-Step Baking Process
Now that you have your ingredients and workspace ready, it’s time to start the baking process. Follow these detailed steps for making the perfect chocolate chip cookies:
1. Creaming the Butter and Sugars: Begin by placing your softened butter in a large mixing bowl. Add both brown sugar and granulated sugar. Using a hand mixer or stand mixer, beat the butter and sugars together on medium speed until the mixture is light and fluffy, about 2-4 minutes. This process incorporates air into the dough, which is essential for the cookies to rise and become light.
2. Incorporating Eggs: Next, add the egg(s) to the creamed mixture. Mix on low speed until just combined, being careful not to overbeat, as this can lead to tough cookies. If your recipe calls for vanilla extract, now is the time to add it. The vanilla enhances the flavor profile of your cookies, making them even more irresistible.
3. Slowly Adding Dry Ingredients: In a separate bowl, whisk together your dry ingredients, typically flour, baking soda, and salt. Gradually add this mixture to the wet ingredients, mixing on low speed or using a spatula to fold the ingredients together. This step ensures that the dry ingredients are evenly distributed throughout the dough, preventing clumps and promoting uniform texture.
4. Folding in Chocolate Chips: Once your dry ingredients are fully incorporated, gently fold in your chocolate chips using a spatula. Be careful not to overmix, as you want to maintain the airiness of the dough.
5. Chilling the Dough: For optimal flavor and texture, consider chilling your dough for at least 30 minutes in the refrigerator. Chilling allows the flavors to meld together and helps prevent the cookies from spreading too much while baking. If time allows, chilling the dough for several hours or overnight can yield even better results.
6. Prepping the Baking Sheets: While your dough is chilling, preheat your oven to the temperature specified in your recipe (typically around 350°F or 175°C). Line your baking sheets with parchment paper or silicone baking mats to prevent sticking and ensure even baking.
With these steps completed, you are well on your way to creating delicious homemade chocolate chip cookies that will delight your family and friends. As you follow the remaining steps to bake and cool your cookies, remember that the joy of baking comes not just from the finished product but from the entire process itself.
Baking the Cookies
Preheating the Oven: Why It’s Crucial
Preheating your oven is a fundamental step in baking, especially when it comes to achieving the perfect texture for your Golden Bliss: Crackly Brown Butter Blondies. Preheating ensures that the oven reaches the required temperature before you place your batter inside, allowing for even baking. This process helps the blondies rise properly and develop that desirable golden crust. For blondies, a typical preheating temperature is 350°F (175°C). This moderate heat is essential for slowly melting the butter and allowing the sugars to caramelize, creating that rich flavor and crackly top.
Recommended Baking Time and Temperature for Perfect Cookies
Once your oven is preheated, it’s time to bake! Pour your blondie batter into a well-greased or parchment-lined baking dish. Bake at 350°F (175°C) for about 25 to 30 minutes. However, baking times can vary slightly depending on your oven and the size of your baking dish. It’s essential to keep an eye on the blondies, especially as they near the 25-minute mark.
Signs to Look for When Cookies Are Done Baking
So how do you know when your blondies are ready? The key signs to look for include:
1. Golden Edges: The edges should begin to pull away from the sides of the pan and turn a beautiful golden brown.
2. Crackly Top: A distinct crackly surface is a hallmark of perfectly baked blondies. This indicates that the sugar has caramelized, contributing to the delicious flavor.
3. Slightly Soft Center: A toothpick inserted in the center should come out with moist crumbs, not wet batter. Remember, the blondies will continue to cook slightly after being removed from the oven.
Cooling Techniques: Wire Racks vs. Cooling Sheets
After you’ve successfully baked your blondies, it’s vital to let them cool properly to achieve the best texture. You can choose between two methods:
– Wire Racks: Transferring the blondies to a wire rack allows for maximum air circulation, preventing sogginess and ensuring that they cool evenly. This method is ideal if you plan to serve them later.
– Cooling Sheets: If you don’t have a wire rack, you can let them cool in the baking dish for about 10 minutes before transferring them to a cooling sheet. This method is convenient but may not cool them as evenly.
Storing and Enjoying Your Cookies
Best Practices for Storing Homemade Chocolate Chip Cookies
To maintain the freshness of your Golden Bliss blondies, store them in an airtight container at room temperature. They can last up to a week, but their best flavor and texture are enjoyed within the first few days. If you want to keep them longer, consider refrigerating them for up to two weeks. However, letting them sit out at room temperature before serving will help restore their soft, chewy texture.
How to Freeze Cookie Dough for Later Use
If you want to bake your blondies at a later date, freezing the dough is an excellent option. After preparing the batter, scoop it into balls and place them on a baking sheet lined with parchment paper. Freeze the balls until solid, then transfer them to a resealable freezer bag or airtight container. This way, you can bake fresh blondies anytime by preheating your oven and baking the frozen dough balls for an additional 2-3 minutes.
Creative Ways to Enjoy Chocolate Chip Cookies
There are countless delightful ways to enjoy your Golden Bliss blondies:
– Ice Cream Sandwiches: Place a scoop of your favorite ice cream between two blondie pieces for a decadent treat.
– Crumble Toppings: Crumble the blondies over vanilla ice cream or yogurt for a delicious dessert topping.
– Classic Pairing: Serve your blondies with a glass of cold milk or a steaming cup of coffee for a comforting experience.
Variations of Chocolate Chip Cookies
Exploring Alternative Flours for Gluten-Free Options
If you or someone you know is gluten-sensitive, you can easily make gluten-free blondies. Substitute all-purpose flour with gluten-free flour blends, almond flour, or even oat flour. Adjusting the liquid content slightly may be necessary, as gluten-free flours can absorb moisture differently.
Vegan Chocolate Chip Cookie Recipes: Substitutions for Eggs and Butter
For a vegan version of your Golden Bliss blondies, swap out the butter for coconut oil or vegan butter and replace the eggs with flaxseed meal or applesauce. To make flaxseed eggs, mix one tablespoon of ground flaxseed with three tablespoons of water and let it sit for about 10 minutes until it thickens.
Adding Spices or Flavors: Cinnamon, Vanilla, or Espresso
To elevate the flavor profile of your blondies, consider adding spices or extracts. A teaspoon of cinnamon can add warmth, while a splash of vanilla extract enhances the overall sweetness. For coffee lovers, incorporating a teaspoon of espresso powder will deepen the flavor of the blondies.
Creative Mix-Ins: Dried Fruits, Different Types of Chocolate, or Nut Butters
To personalize your blondies, mix in ingredients like chopped nuts, dried fruits (such as cranberries or apricots), or various types of chocolate (dark, white, or even butterscotch). For a richer taste, swirl in some nut butter, such as peanut butter or almond butter.
Healthier Alternatives
Reducing Sugar: Tips for a Healthier Cookie
If you’re looking to reduce sugar in your blondies, consider using a sugar substitute like coconut sugar or stevia. These alternatives can provide sweetness with fewer calories. Additionally, you can decrease the overall sugar content by about 25% without compromising the texture too much.
Incorporating Whole Grains: Using Oats or Whole Wheat Flour
Another way to make your blondies healthier is by incorporating whole grains. Substitute half of the all-purpose flour with whole wheat flour or add oats for added fiber. This not only improves the nutritional profile but also creates a delightful texture.
Low-Calorie Options: Modifying Recipes for a Lighter Treat
To create a lighter version of your Golden Bliss blondies, consider reducing the amount of fat used. You can replace half of the butter with unsweetened applesauce or mashed bananas. This substitution will maintain moisture while cutting calories and fat.
The Cultural Impact of Chocolate Chip Cookies
A Brief History of Chocolate Chip Cookies
The chocolate chip cookie was invented in the 1930s by Ruth Wakefield, who owned the Toll House Inn in Massachusetts. Her creation quickly gained popularity, leading to the iconic Toll House cookie recipe we know today. The introduction of chocolate chips into cookie dough revolutionized baking and established the cookie as a staple dessert in American households.
How Chocolate Chip Cookies Have Evolved Over the Years
Over the decades, chocolate chip cookies have seen countless adaptations, from chewy to crunchy, and from classic to gourmet versions. Creative bakers have experimented with flavor combinations, ingredients, and even presentation, leading to a myriad of variations that cater to different tastes and dietary preferences.
The Cookie’s Place in Popular Culture and Baking Traditions
Chocolate chip cookies hold a special place in popular culture, often symbolizing comfort and nostalgia. They frequently appear in movies, television shows, and literature, reinforcing their status as a beloved treat. Many families have their own unique traditions surrounding cookie baking, making it a cherished activity that brings people together.
Conclusion
Baking homemade Golden Bliss: Crackly Brown Butter Blondies is not just about making a delicious treat; it’s about the joy of creating something special in your kitchen. The process of experimenting with flavors, techniques, and variations allows you to personalize your baking experience and share it with loved ones. So whether you stick to the classic recipe or venture into new flavor territories, remember that the heart of baking lies in the joy it brings to you and those you care about. Embrace the art of baking, share your creations, and continue the tradition of homemade cookies—because nothing says love quite like a warm, freshly baked blondie.
