
Nutty Crunch No-Bake Trail Mix Bars: A Deliciously Healthy Snack
In recent years, no-bake snacks have surged in popularity among health-conscious individuals and busy families alike. These quick and easy treats offer a convenient solution for satisfying cravings without the need for an oven, making them ideal for those who want to whip up something delicious in a fraction of the time. Among the myriad of no-bake recipes available, Nutty Crunch No-Bake Trail Mix Bars stand out as a healthy and convenient option that caters to a variety of dietary preferences.
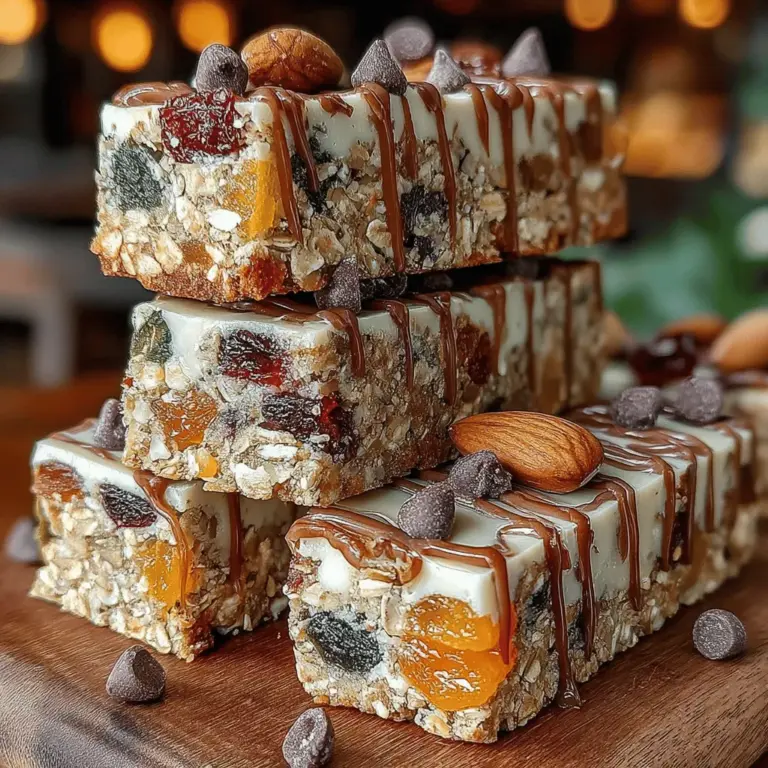
Nutty Crunch No-Bake Trail Mix Bars are not only simple to prepare but also packed with nutrition. They provide a perfect balance of healthy fats, protein, and carbohydrates, making them a great choice for breakfast, an afternoon pick-me-up, or a post-workout snack. The beauty of these bars lies in their versatility; you can customize them to suit your taste preferences or dietary restrictions, ensuring that there’s something for everyone.
The Benefits of Homemade Trail Mix Bars
One of the main advantages of making your own trail mix bars is the ability to control exactly what goes into them. Store-bought options can often be loaded with added sugars, preservatives, and unhealthy fats, while homemade versions allow you to choose wholesome ingredients that align with your nutritional goals. By preparing these bars at home, you can also experiment with various flavors and textures, adding your favorite nuts, seeds, and dried fruits to create a truly unique snack.
Additionally, Nutty Crunch No-Bake Trail Mix Bars are an excellent source of energy. The combination of whole grains, nuts, and seeds provides sustained fuel to keep you energized throughout the day. Plus, they are perfect for on-the-go snacking, fitting easily into lunch boxes, gym bags, or even your pocket for those busy days when you need a quick bite.
Understanding the Ingredients
To create these delicious Nutty Crunch No-Bake Trail Mix Bars, it’s essential to understand the key ingredients that contribute to their flavor and nutritional value.
1. Rolled Oats: A staple in many healthy recipes, rolled oats are the foundation of these bars. They are rich in dietary fiber, which aids in digestion and helps keep you feeling full longer. Oats also provide complex carbohydrates, making them an excellent source of energy.
2. Mixed Nuts: Nuts add a satisfying crunch and are packed with healthy fats, protein, and essential vitamins and minerals. Almonds, walnuts, cashews, and pecans are popular choices, each bringing its unique flavor profile and health benefits. Nuts are known to promote heart health and can help reduce cholesterol levels.
3. Seeds: Incorporating seeds like chia, flaxseed, or pumpkin seeds enhances the nutritional value of your bars. These tiny powerhouses are rich in omega-3 fatty acids, antioxidants, and additional fiber. Their inclusion not only boosts the health benefits but also adds a delightful crunch to the final product.
4. Dried Fruits: Dried fruits such as cranberries, apricots, or raisins act as natural sweeteners while providing a quick source of energy. They are loaded with vitamins, minerals, and antioxidants, making them a nutritious addition to your bars. Dried fruits can also add a chewy texture that contrasts beautifully with the crunch of nuts and seeds.
5. Nut Butter: Nut butter serves a dual purpose in this recipe. It provides a creamy texture that helps bind the ingredients together, ensuring your bars hold their shape. Additionally, nut butter is a fantastic source of protein and healthy fats, making your snacks even more satisfying.
6. Sweeteners: Depending on your preference, you may choose to add a natural sweetener such as honey or maple syrup. These ingredients not only enhance the flavor but also help to bind the mixture together, ensuring that every bite is deliciously sweet.
7. Optional Ingredient – Mini Chocolate Chips: For those who want to satisfy their sweet tooth, mini chocolate chips can be added as a delightful treat. While optional, they can elevate the taste of your trail mix bars, making them even more appealing to both kids and adults.
Preparation Steps Explained
Now that you understand the ingredients, let’s dive into the preparation steps for making Nutty Crunch No-Bake Trail Mix Bars.
1. Preparing the Pan
Before you begin mixing your ingredients, it’s crucial to prepare your pan. Line an 8×8-inch square baking dish with parchment paper, allowing some overhang on the sides. This simple step is essential for easy removal of the bars once they are set. The parchment paper prevents sticking and ensures that your bars can be lifted out cleanly, allowing you to cut them into neat squares or rectangles.
2. Mixing Dry Ingredients
Start by gathering all your dry ingredients: rolled oats, mixed nuts, seeds, and dried fruits. In a large mixing bowl, combine these ingredients thoroughly. A good technique for even distribution is to stir with a wooden spoon or spatula, making sure that each component is well incorporated. This step enhances the flavor of the bars by ensuring that every bite contains a balanced mix of textures and tastes.
3. Melting Wet Ingredients
Next, it’s time to melt your wet ingredients, which typically include nut butter and your chosen sweetener. In a small saucepan over low heat, gently warm these ingredients until they are fully melted, stirring frequently to avoid burning. Achieving the perfect consistency is key; you want a smooth and pourable mixture that will easily coat the dry ingredients. Be patient during this step, as rushing can lead to scorched nut butter, which can ruin the flavor of your bars.
4. Combining Mixtures
Once your wet ingredients are melted and combined, pour them over the dry mixture in your large bowl. Using a spatula, gently fold the ingredients together until everything is evenly coated. This is where the magic happens—ensuring that each piece of oats, nut, and dried fruit is coated in the sticky mixture allows for a cohesive bar that holds together well. Take your time with this step to make sure that no dry bits remain.
5. Transferring to the Pan
The final step in the preparation process is transferring the mixture to your prepared pan. Pour the combined mixture into the lined baking dish and use the back of a spatula or your hands (lightly moistened to prevent sticking) to press the mixture down firmly. Packing the mixture tightly is crucial for achieving an optimal bar structure; if it’s too loose, the bars may crumble when cut. Aim for an even thickness across the pan to ensure uniform bars.
Stay tuned for the next part, where we will explore how to let your Nutty Crunch No-Bake Trail Mix Bars set and how to cut and store them for maximum freshness and enjoyment!

Chilling and Setting: Why Chilling is Crucial for the Texture of the Bars
After combining your ingredients into a sticky, delicious mixture, the next critical step is chilling. Chilling the Nutty Crunch No-Bake Trail Mix Bars is essential for achieving the right texture. When the mixture cools, it firms up, allowing the bars to hold their shape once cut. If you skip this step, you may end up with a crumbly mess instead of beautifully formed bars.
To chill your bars, first, press the mixture firmly into your prepared baking dish. Use a spatula or even the back of a measuring cup to ensure it’s tightly packed, which will contribute to the overall texture. Place the dish in the refrigerator for at least 1-2 hours, or until the mixture is solid. This waiting period allows the nut butter and sweetener to bond with the dry ingredients, creating a cohesive, chewy bar that’s easy to cut and enjoyable to eat.
Cutting and Serving: Methods for Achieving Clean Cuts and Presentation Tips
Once your Nutty Crunch No-Bake Trail Mix Bars have chilled and set, it’s time for the fun part: cutting and serving. For clean cuts, remove the chilled mixture from the baking dish using the parchment paper overhang. Place it on a cutting board and use a sharp knife to slice the bars into your desired size—whether you prefer larger snack bars or smaller bite-sized pieces.
To achieve the best presentation, consider the following tips:
– Warm the Knife: Run your knife under hot water and then dry it before cutting. This helps the blade glide through the bars more smoothly, resulting in clean edges.
– Use a Straight Edge: For even bars, use a ruler or another straight edge as a guide for measuring and cutting.
– Sprinkle Toppings: Before slicing, you can sprinkle some extra nuts, seeds, or even a light dusting of sea salt on top for a visually appealing finish.
These simple techniques not only enhance the appearance of your bars but also make them more inviting for snacking or serving at gatherings.
Health Benefits of No-Bake Trail Mix Bars
High-Energy Snack Ideal for Pre or Post-Workout
Nutty Crunch No-Bake Trail Mix Bars make for an excellent energy-boosting snack, perfect for pre or post-workout fuel. The combination of nuts, seeds, and dried fruits provides a powerful mix of carbohydrates and healthy fats that help sustain energy levels, making them an excellent choice for athletes and active individuals alike.
Source of Healthy Fats from Nuts and Seeds
The bars are packed with healthy fats derived from nuts and seeds, which are beneficial for heart health. Ingredients like almonds, walnuts, and chia seeds are rich in omega-3 and omega-6 fatty acids, known to support cardiovascular function and reduce inflammation.
Fiber Content from Oats and Dried Fruits Contributing to Digestive Health
In addition to being a great energy source, these bars are also high in fiber, thanks to the oats and dried fruits. Fiber plays a crucial role in promoting digestive health, helping to maintain regular bowel movements and prevent constipation. Including these bars in your diet can contribute to a balanced digestive system.
Customizable Ingredients Catering to Dietary Preferences
One of the greatest advantages of making your own Nutty Crunch No-Bake Trail Mix Bars is the ability to customize the ingredients to fit your dietary needs. Whether you’re gluten-free, vegan, or have specific allergies, you can easily adjust the recipe. Substitute oats with gluten-free oats, use maple syrup instead of honey for a vegan option, or swap out nuts based on what you have on hand or your personal preferences.
Creative Variations and Customizations
Suggestions for Alternative Nuts, Seeds, and Dried Fruits
While the classic recipe is delicious as is, exploring alternative ingredients can lead to exciting new flavors. Consider trying:
– Nuts: Cashews, pecans, or hazelnuts for different textures and taste profiles.
– Seeds: Pumpkin seeds or sunflower seeds can add crunch and are great for adding nutrients.
– Dried Fruits: Swap raisins for cranberries, apricots, or even figs for a unique sweetness.
Ideas for Flavor Enhancements
To elevate the taste further, consider adding spices or flavor enhancers. A teaspoon of cinnamon or a dash of nutmeg can add warmth. If you enjoy tropical flavors, shredded coconut or coconut flakes can provide a delightful twist.
Ways to Adjust Sweetness
If you prefer a less sweet bar, experiment with different types of sweeteners. Using mashed bananas or unsweetened applesauce can reduce the sugar content while adding moisture. Alternatively, you can try using stevia or monk fruit as low-calorie sweetener options.
Recommendations for Making the Bars Allergen-Friendly
To make these bars allergen-friendly, substitute common allergens with safe alternatives. For example, if someone has a nut allergy, replace nuts with seeds like sunflower or pumpkin seeds. Using sunflower seed butter in place of peanut or almond butter can also keep the recipe nut-free.
Storage and Shelf Life
Best Practices for Storing Nutty Crunch No-Bake Trail Mix Bars
Proper storage is essential to maintain the freshness and quality of your Nutty Crunch No-Bake Trail Mix Bars. Store them in an airtight container at room temperature for up to a week. If you live in a warmer climate or want to extend shelf life, refrigerating the bars is advisable.
Understanding Shelf Life: Room Temperature vs. Refrigeration
When stored at room temperature, these bars can last about 5-7 days. However, if you choose to refrigerate them, they can last up to 2 weeks. Always ensure that the container is sealed well to avoid moisture, which can lead to spoilage.
Tips for Avoiding Spoilage and Maintaining Freshness
To avoid spoilage, keep the bars away from direct sunlight and humidity. If you’ve made a large batch, consider cutting them into individual portions and wrapping them in parchment paper. This allows for convenient grab-and-go snacks while keeping them fresh.
Conclusion
In summary, Nutty Crunch No-Bake Trail Mix Bars are not only easy to make but also packed with health benefits, making them an ideal snack for anyone looking to maintain a balanced diet. The customizable nature of the recipe allows you to experiment with various ingredients and find combinations that you love.
Homemade snacks like these bars are not just a healthier alternative to store-bought options; they also offer the convenience of being ready to eat whenever hunger strikes. So, roll up your sleeves, gather your ingredients, and enjoy the process of creating your own delicious and nutritious trail mix bars at home. Don’t hesitate to explore and innovate, as the best snacks often come from personal touches and culinary creativity!
