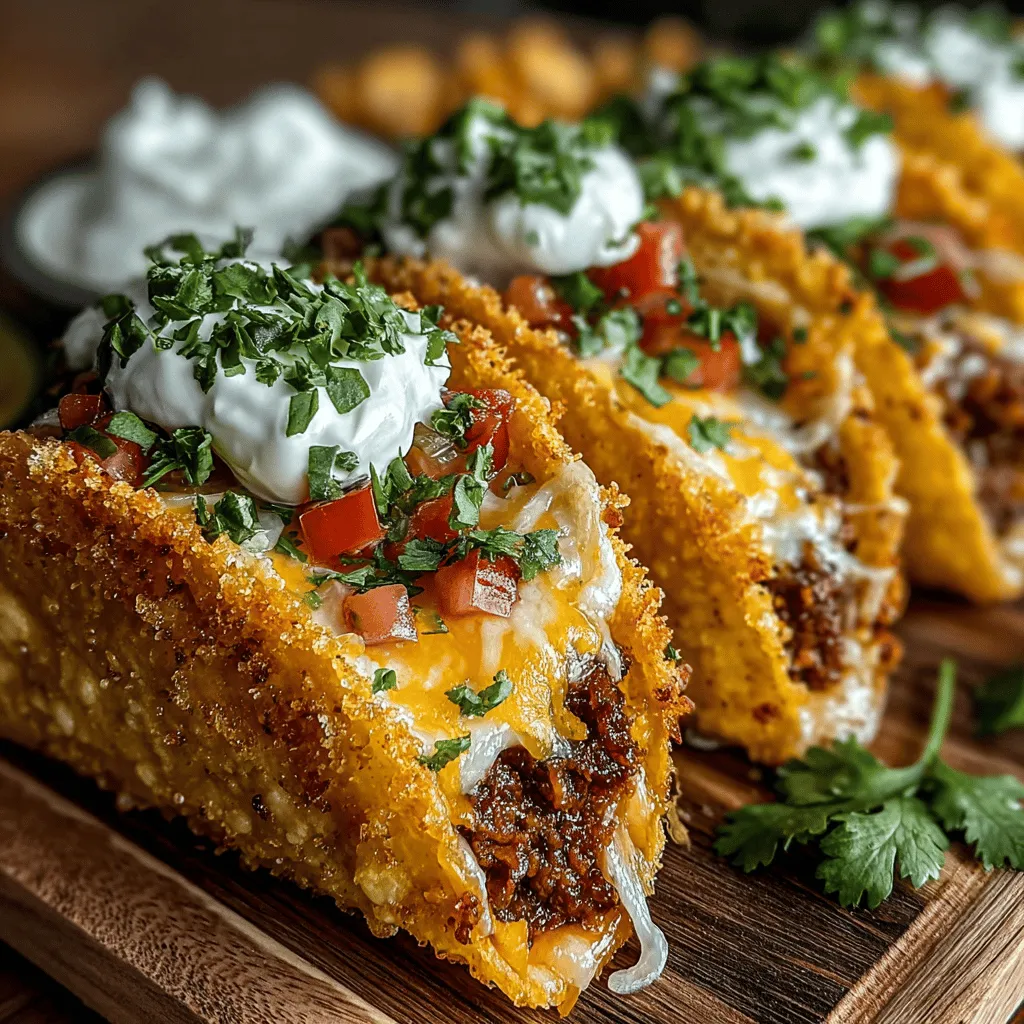
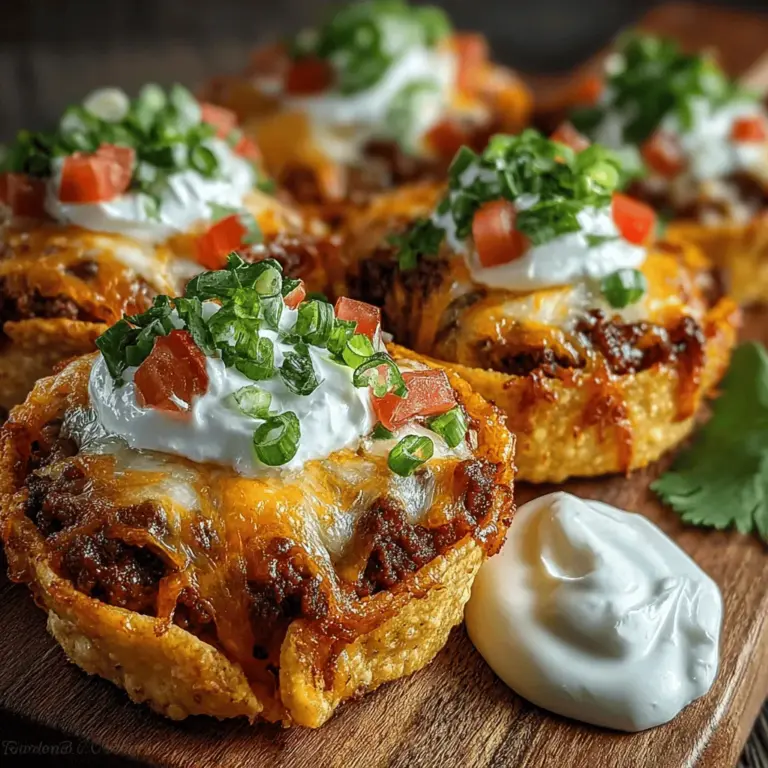
Introduction to Cheesy Taco Bites Fiesta
If you’re on the lookout for a crowd-pleasing appetizer that combines the beloved flavors of tacos with the irresistible allure of cheese, then Cheesy Taco Bites Fiesta is the perfect recipe for you. These delightful mini taco shells are packed with a creamy, cheesy filling that is sure to be a hit at any gathering—be it a casual game night, a festive family dinner, or a lively party with friends. Not only are they fun to make, but they are equally enjoyable to eat, making them a versatile addition to your culinary repertoire.
Imagine biting into a crispy shell filled with a luscious blend of cheddar, Monterey Jack, and cream cheese, seasoned to perfection with zesty spices and fresh vegetables. The explosion of flavors and textures will tantalize your taste buds, and your guests will undoubtedly be asking for seconds. In this article, we will explore the essential ingredients that elevate the Cheesy Taco Bites Fiesta, guide you through the preparation steps, and share tips to ensure your taco bites turn out perfectly every time.
Understanding the Ingredients for Cheesy Taco Bites Fiesta
Overview of Key Ingredients
To create the ultimate Cheesy Taco Bites Fiesta, you’ll need a selection of key ingredients that work harmoniously together. The star of this recipe is, of course, the cheesy filling, but it all starts with the mini taco shells that provide the perfect vehicle for all that deliciousness. A well-crafted filling is essential, and it primarily consists of a blend of cheeses, cream cheese, fresh vegetables, and a medley of spices that bring everything to life.
Cheeses Used in the Recipe
When it comes to the cheese selection for these taco bites, both cheddar and Monterey Jack are excellent choices. Cheddar cheese offers a sharp, tangy flavor that balances beautifully with the milder, creamier Monterey Jack. This combination not only enhances the overall taste but also contributes to the dish’s creamy texture when melted. Cheddar’s robust flavor ensures that each bite is packed with intensity, while Monterey Jack brings a smooth, gooey quality that makes the filling irresistible.
The Role of Cream Cheese
Cream cheese plays a crucial role in this recipe, acting as the binding agent that brings all the ingredients together. Its rich, velvety texture not only enhances the overall creaminess of the filling but also adds a subtle tang that complements the other cheeses. When blended with the other ingredients, cream cheese helps to create a cohesive mixture that is easy to fill into the taco shells, ensuring a delightful bite every time.
Fresh Vegetables and Seasoning
To elevate the flavor profile of your Cheesy Taco Bites Fiesta, incorporating fresh vegetables and spices is key. Green onions add a crunchy texture and mild onion flavor, while juicy tomatoes provide a burst of freshness. Seasoning is equally important; spices like garlic powder, cumin, and chili powder infuse the filling with warmth and depth. These ingredients work together to create a filling that is not only cheesy but also vibrant and flavorful, ensuring that every bite is a fiesta for your taste buds.
Preparing the Cheesy Taco Filling
Mixing the Cheese Mixture
The first step in preparing your Cheesy Taco Bites Fiesta is to create the scrumptious cheese filling. Begin by gathering all your ingredients, including the cheddar, Monterey Jack, cream cheese, chopped vegetables, and spices. In a mixing bowl, combine the shredded cheeses and softened cream cheese. Using a spatula or a hand mixer, blend the ingredients together until you achieve a smooth and well-integrated mixture. Make sure that there are no lumps of cream cheese remaining, as this will ensure a uniform filling that is easy to spoon into the taco shells.
Tips for Achieving the Right Consistency
To ensure that your cream cheese is soft enough to blend seamlessly with the other ingredients, take a few moments to let it sit at room temperature before starting your preparation. If you’re short on time, you can microwave the cream cheese for 10-15 seconds to soften it slightly. Just be cautious not to overheat it, as this can change its texture. The goal is to achieve a creamy consistency that can easily be mixed with the other ingredients, making the filling both smooth and easy to work with.
Filling the Mini Taco Shells
With your cheese mixture ready, it’s time to fill the mini taco shells. Choosing the right tools for this task can make the process much more manageable. A small spoon works well for spooning the filling into the shells, but for a more precise application, consider using a piping bag. This method allows you to easily control the amount of filling you place in each shell, ensuring they are packed just right without overflowing.
Packing the Taco Shells
When filling the mini taco shells, be sure to pack them generously but not overstuff them, as this can cause the shells to break or become messy. Gently press the filling into the shell to secure it in place, and make sure to leave a little room at the top for melting and bubbling during baking. Once you have filled all the taco shells, they are ready to be baked to perfection, where the cheese will melt and the flavors will meld beautifully.
By following these steps, you will be on your way to creating mouthwatering Cheesy Taco Bites Fiesta that will surely become a favorite among your family and friends. Prepare for a burst of flavors in every bite, and get ready to impress your guests with this delightful appetizer. Stay tuned for the next part, where we will explore the baking process and some serving suggestions!

As you prepare to bake your Cheesy Taco Bites Fiesta, it’s essential to ensure that each taco shell is filled correctly. Packing the filling lightly will prevent overflow while ensuring that every shell is generously filled with the delicious mixture of cheeses, spices, and your favorite fillings. Let’s dive into the baking process and discover how to achieve the perfect cheesy taco bites!
Baking the Cheesy Taco Bites
Preheating the Oven
Before you get started with baking, preheating the oven is a crucial step that should not be overlooked. Setting your oven to the right temperature ensures that the heat circulates evenly, which is vital for cooking the taco bites thoroughly. For this recipe, preheat your oven to 375°F (190°C). This temperature is optimal for achieving that golden, crispy edge while allowing the cheese to melt perfectly, creating a gooey, delicious filling.
Arranging the Taco Shells on the Baking Sheet
Once your shells are filled and your oven is preheating, it’s time to arrange your taco shells on a baking sheet. Using a rimmed baking sheet will help contain any drips from the cheese during baking. Lay the filled taco shells side by side, ensuring they’re not overcrowded. This spacing allows the hot air to circulate freely around each taco bite, promoting even baking and stability. If your shells seem wobbly, you can crumple a piece of aluminum foil and place it in the center of the baking sheet to create a makeshift holder that helps keep the shells upright.
Baking Time and Temperature
With your taco bites arranged, it’s now time to bake them. Place the baking sheet in the preheated oven and set your timer for 15-20 minutes. Keep a close eye on them, as you want to look for the telltale signs of perfection: the edges should be golden brown, and the cheese should bubble enticingly. If you notice that the cheese hasn’t melted completely, you can leave them in for an additional 2-3 minutes, but be careful not to overbake, as this can cause the shells to become too hard.
Serving Suggestions for Cheesy Taco Bites Fiesta
Once your Cheesy Taco Bites are perfectly baked, it’s time to serve them up! These tasty morsels are not only delightful on their own but pair beautifully with a variety of sides and garnishes.
Ideal Pairings for Serving
To elevate your Cheesy Taco Bites Fiesta experience, consider serving them with complementary sides. Sour cream is a classic choice that adds a creamy richness that balances the spiciness of the filling. Guacamole is another fantastic option, bringing a smooth, buttery texture that enhances the overall flavor. For those who enjoy a bit of heat, a side of salsa—whether mild or spicy—will add an extra zing to every bite. Offering a variety of dips allows guests to customize their flavors, making the experience even more enjoyable.
Garnishing with Fresh Ingredients
Don’t forget the finishing touches! Garnishing your Cheesy Taco Bites with fresh ingredients not only enhances the visual appeal but adds a burst of flavor as well. Sprinkling chopped cilantro over the top can provide a pop of color and freshness that complements the richness of the cheese. If you have lime wedges on hand, serve them alongside for a zesty squeeze that brightens the dish even further. These small details can make your presentation inviting and appetizing.
The Joy of Sharing Cheesy Taco Bites
Perfect for Gatherings and Celebrations
Cheesy Taco Bites Fiesta are more than just a delicious treat; they embody the spirit of fun and togetherness. Their bite-sized nature makes them ideal for gatherings, celebrations, or casual get-togethers. Whether it’s a birthday party, a family reunion, or a laid-back movie night, these cheesy delights will surely be a crowd-pleaser. The interactive nature of serving and sharing these bites encourages conversation and connection among friends and family, making every occasion special.
Personalization and Variations
One of the best aspects of the Cheesy Taco Bites recipe is its versatility. Feel free to get creative with the fillings! You can experiment with different meats, such as shredded chicken, ground beef, or pork. For a vegetarian option, consider adding black beans, corn, or sautéed bell peppers. You can also play around with different cheese combinations—think pepper jack for a spicy kick or a blend of cheddar and mozzarella for a classic taste. By personalizing the filling, you can cater to different tastes and dietary preferences, ensuring that everyone at your gathering finds something they enjoy.
Conclusion: Embrace the Fiesta with Cheesy Taco Bites
In conclusion, Cheesy Taco Bites Fiesta encapsulates the spirit of fun and flavor in every bite. This easy-to-make recipe not only satisfies cravings but also brings people together, making it a perfect addition to any occasion. The combination of creamy cheeses, zesty spices, and fresh ingredients creates a delightful experience that is both enjoyable to create and to share. Whether you’re hosting a party or simply indulging in a cozy night at home, these cheesy bites are sure to be a hit. Enjoy the vibrant flavors and the joy of sharing delicious food with loved ones!
By following these detailed steps and tips, your Cheesy Taco Bites will turn out perfectly every time. So gather your ingredients, preheat your oven, and prepare for a fiesta of flavor that everyone will love!


