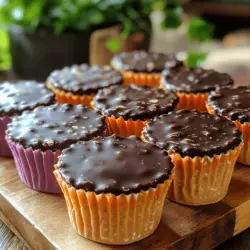
Creamy Frozen Yogurt Peanut Butter Cups with Oats: A Nutritious Indulgence
In recent years, frozen yogurt desserts have surged in popularity, captivating the hearts and taste buds of dessert lovers around the globe. This delightful treat offers a lighter alternative to traditional ice cream while still delivering on flavor and satisfaction. Among the many variations of frozen yogurt desserts, creamy frozen yogurt peanut butter cups with oats stand out as a harmonious blend of indulgence and nutrition. This recipe not only satisfies your sweet tooth but also provides a wholesome combination of creamy yogurt, rich peanut butter, and crunchy oats that makes it a guilt-free indulgence.
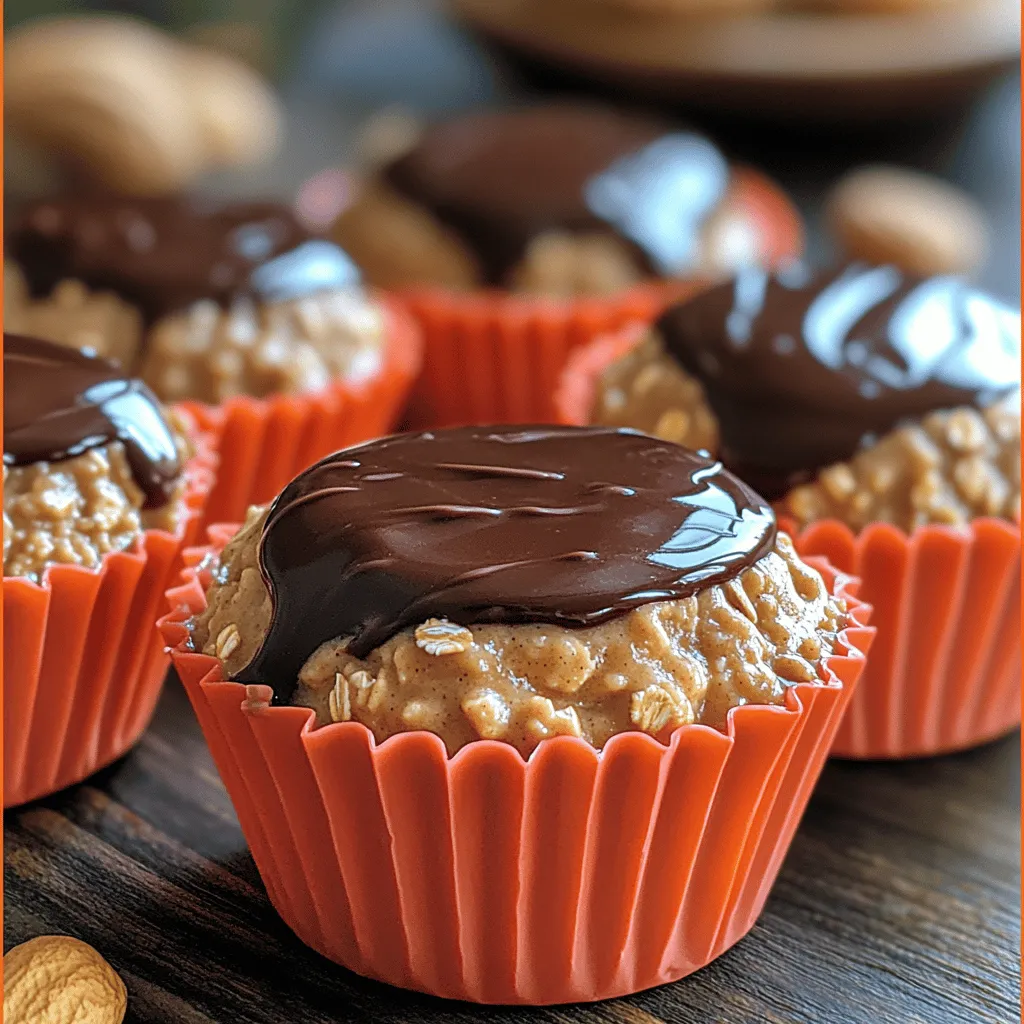
The appeal of these frozen yogurt peanut butter cups lies in their perfect balance of flavors and textures. The creamy yogurt base meets the velvety richness of peanut butter, while the oats add a delightful crunch that elevates each bite. Whether you’re looking for a refreshing treat on a hot day or a wholesome snack to curb your cravings, these yogurt cups are sure to impress.
Understanding the Ingredients
To create these delectable frozen yogurt peanut butter cups, it’s essential to understand the key ingredients that make this recipe not only delicious but also nutritious.
Greek Yogurt: The foundation of this recipe is Greek yogurt, known for its creamy texture and high protein content. Unlike regular yogurt, Greek yogurt undergoes a straining process that removes excess whey, resulting in a thicker product that is perfect for frozen desserts. Packed with probiotics, Greek yogurt aids digestion and contributes to gut health. Additionally, its protein content makes it a filling option that can keep you satiated for longer.
Peanut Butter: Adding a rich, nutty flavor, natural peanut butter is an integral component of this recipe. It is not only delicious but also loaded with healthy fats, protein, and essential vitamins like vitamin E and magnesium. When choosing peanut butter, it’s best to opt for varieties that contain no added sugars or unhealthy oils. The creamy texture of peanut butter complements the yogurt, creating a luscious base that is hard to resist.
Natural Sweeteners: To enhance sweetness without relying on refined sugars, this recipe calls for natural sweeteners such as honey or maple syrup. Both options offer their unique flavors and health benefits. Honey is known for its antibacterial properties and is a great source of antioxidants, while maple syrup contains minerals like manganese and zinc. Using these natural sweeteners not only keeps the dessert healthier but also adds a depth of flavor that enhances the overall taste.
Oats: Rolled oats play a crucial role in this recipe, providing both texture and nutrition. Oats are a whole grain that is rich in fiber, which can help reduce cholesterol levels and promote heart health. The soluble fiber in oats also aids in digestion and helps to maintain stable blood sugar levels. Plus, the nutty flavor of oats complements the other ingredients beautifully, adding a unique crunch to the creamy yogurt cups.
Dark Chocolate: To finish off these peanut butter cups, a sprinkle of dark chocolate provides a delightful topping, elevating the dessert to the next level. Dark chocolate is rich in antioxidants and has been linked to several health benefits, including improved heart health and enhanced brain function. When used in moderation, dark chocolate can add a touch of indulgence without compromising the nutritious value of the treat.
Step-by-Step Instructions
Now that we’ve explored the ingredients, let’s dive into the step-by-step process of creating these creamy frozen yogurt peanut butter cups.
Preparation of the Base Mixture:
Start by gathering your ingredients: Greek yogurt, natural peanut butter, your choice of honey or maple syrup, pure vanilla extract, and a pinch of salt. In a mixing bowl, combine 2 cups of Greek yogurt with 1 cup of natural peanut butter. It’s essential to use a smooth peanut butter for the best consistency. Next, add 2-3 tablespoons of honey or maple syrup, depending on your desired level of sweetness, along with 1 teaspoon of vanilla extract and a pinch of salt to enhance the flavors.
Using a whisk or an electric mixer, blend the ingredients together until you achieve a smooth, creamy consistency. This step is crucial; a well-mixed base will ensure that your peanut butter cups are velvety and enjoyable. If the mixture feels too thick, you can add a splash of milk (dairy or non-dairy) to loosen it up slightly, but be cautious not to make it too runny.
Incorporation of Oats:
Once your base mixture is smooth and well-blended, it’s time to fold in the rolled oats. Take 1 cup of rolled oats and gently incorporate them into the yogurt-peanut butter mixture. Use a spatula to fold the oats in carefully, ensuring they are evenly distributed without overmixing. The oats will add a delightful crunch and chewy texture to the frozen yogurt cups, making each bite a satisfying experience.
Molding the Cups:
Next, it’s time to mold your mixture into individual servings. Prepare a muffin tray by lining it with paper liners or, for a more eco-friendly option, use silicone molds. If you’re using a muffin tray, ensure that the liners are sturdy enough to hold the mixture. Alternatively, silicone molds are perfect for easy release once the cups are frozen.
Using a spoon or a small ice cream scoop, portion the yogurt-oat mixture into the prepared molds. Fill each mold to the top, pressing the mixture down gently to eliminate any air pockets. This will ensure a solid structure once frozen. After filling all the molds, you can use a spatula to smooth the tops for a polished finish.
Freezing Process:
Once all the molds are filled, place the muffin tray or silicone molds in the freezer. Allow them to freeze for at least 4 hours, or until they are completely solid. For the best results, you may want to leave them overnight. Once fully frozen, you can easily pop them out of the molds and store them in an airtight container in the freezer.
These creamy frozen yogurt peanut butter cups with oats offer a perfect blend of flavors and textures, making them an ideal treat for any occasion. As you embark on this delightful recipe, you’ll not only create a delicious dessert but also a nutritious option that you can feel good about enjoying. Stay tuned for the next part where we’ll explore additional tips, variations, and serving suggestions to enhance your experience with this delectable treat.
Importance of Freezing Time for Proper Setting
The key to achieving perfectly set Creamy Frozen Yogurt Peanut Butter Cups lies in the freezing time. It’s vital to allow the cups to freeze long enough to solidify completely, ensuring they maintain their shape during handling and serving. A minimum of 4 hours is recommended, but for best results, leaving them in the freezer overnight is ideal. This extended freezing period not only allows the yogurt and peanut butter filling to firm up but also enhances the overall flavor and texture of the dessert.
Suggestions on How to Check for Doneness
To determine whether your yogurt cups are ready, gently press the top of a cup with your finger. If it feels firm and retains its shape without leaving an indentation, they are set. Alternatively, you can remove one cup from the freezer and let it sit at room temperature for a minute; if it softens too quickly, it may need more time in the freezer. Remember, the goal is to have a solid yet creamy texture that provides that delightful contrast when you take a bite.
Melting and Topping with Chocolate
Step-by-Step Guide to Melting Dark Chocolate Safely
Melting dark chocolate is a simple process, but it requires attention to prevent burning. Here’s how to do it safely:
1. Choose Quality Chocolate: Start with good-quality dark chocolate, as the flavor will significantly impact your dessert. Look for chocolate with at least 70% cocoa for a rich taste.
2. Chop the Chocolate: Break the chocolate into small, even pieces. This allows it to melt evenly and reduces the risk of scorching.
3. Double Boiler Method: Fill a medium saucepan with a few inches of water and bring it to a simmer. Place a heatproof bowl over the saucepan, ensuring it doesn’t touch the water. Add the chopped chocolate to the bowl. Stir occasionally as it melts until smooth.
4. Microwave Method: If you prefer a quicker method, you can use a microwave. Place the chopped chocolate in a microwave-safe bowl and heat in 20-second intervals, stirring in between until fully melted and smooth.
Techniques for Dipping or Drizzling Chocolate on the Yogurt Cups
Once your chocolate is melted, it’s time to add that luscious layer to your yogurt cups. Here are two techniques you can use:
1. Dipping: If your yogurt cups are in silicone molds, carefully remove them one by one. Dip the top of each cup into the melted chocolate, ensuring it’s evenly coated. Allow any excess chocolate to drip off before placing them back on the tray.
2. Drizzling: For a more artistic touch, transfer the melted chocolate to a piping bag or a plastic sandwich bag with a small corner snipped off. Drizzle the chocolate over the tops of the yogurt cups in a zigzag pattern, creating an appealing visual effect.
Final Freezing
After you’ve dipped or drizzled the chocolate on the yogurt cups, it’s time for the final freeze. Place the cups back in the freezer for an additional 1 to 2 hours. This ensures the chocolate hardens completely, creating a satisfying crunch when you bite into the creamy yogurt filling.
Serving and Storage Suggestions
Presentation Ideas for Serving the Frozen Yogurt Cups
When it comes to serving your Frozen Yogurt Peanut Butter Cups, presentation can elevate the experience. Consider these ideas:
– Platter Display: Arrange the yogurt cups on a decorative platter, garnished with fresh berries or mint leaves for a pop of color.
– Individual Cups: Serve each yogurt cup in a small dessert cup or glass, topped with whipped cream and a sprinkle of crushed nuts for added texture.
– Drizzle of Sauce: Drizzle some chocolate or caramel sauce over the yogurt cups right before serving for a gourmet touch.
How to Store Leftovers in an Airtight Container
If you have any leftovers (though they’re likely to disappear quickly), store them in an airtight container to maintain their freshness. Layer the cups in the container with parchment paper between them to prevent sticking.
Duration of Freezer Storage and Best Practices for Maintaining Texture
These yogurt cups can be stored in the freezer for up to 3 months. To maintain their creamy texture, be sure to keep them tightly sealed. Avoid leaving the container open for prolonged periods, as exposure to air can lead to freezer burn, affecting both flavor and texture.
Health Benefits of Frozen Yogurt Peanut Butter Cups
Overview of Calorie Content Compared to Traditional Desserts
One of the standout features of these Creamy Frozen Yogurt Peanut Butter Cups is their lower calorie content compared to traditional dessert options. While a typical chocolate peanut butter cup can range from 100 to 200 calories each, these homemade versions offer a healthier alternative. Depending on your ingredient choices, you can enjoy each cup for around 60 to 80 calories, making it an indulgence you can feel good about.
Discuss the Balance of Macros: Proteins, Fats, and Carbohydrates
This recipe provides a balanced mix of macronutrients. The yogurt contributes protein, essential for muscle recovery and overall health, while the peanut butter offers healthy fats that keep you satiated. The oats add complex carbohydrates, providing sustained energy. With this balance, these yogurt cups can fit into a well-rounded diet, satisfying sweet cravings without derailing your nutritional goals.
How This Recipe Can Fit into a Balanced Diet as a Healthy Dessert Option
Incorporating these frozen yogurt cups into your diet can be a delightful way to satisfy your sweet tooth without compromising on health. They serve as an excellent post-workout treat or a guilt-free dessert after dinner. By making your own treats, you can control the ingredients and adjust sweetness levels to suit your personal preferences and dietary needs.
Variations and Customizations
Suggestions for Alternative Nut Butters
While peanut butter offers a classic flavor, don’t hesitate to switch it up! Almond butter or cashew butter can provide a unique twist while still delivering that creamy texture. Each nut butter brings its own distinct taste and health benefits, allowing you to customize the recipe to your liking.
Ideas for Flavoring the Yogurt Base
To add more dimension to the yogurt base, consider mixing in ingredients like:
– Cocoa Powder: For a rich chocolate flavor, blend in unsweetened cocoa powder. This will give your cups a chocolatey twist that pairs beautifully with peanut butter.
– Spices: A dash of cinnamon or a hint of vanilla extract can elevate the flavor profile, adding warmth and depth.
Options for Dairy-Free or Vegan Alternatives
For those following a dairy-free or vegan lifestyle, use plant-based yogurt made from coconut, almond, or soy. Ensure your chocolate is dairy-free as well, and opt for maple syrup or agave nectar instead of honey for sweetness.
Creative Toppings Beyond Chocolate
While chocolate is a traditional topping, don’t shy away from other delicious options:
– Chopped Nuts: Sprinkle chopped almonds, walnuts, or pecans on top for an added crunch and nutritional boost.
– Seeds: Pumpkin or sunflower seeds can add a delightful texture and additional nutrients.
– Dried Fruit: A few pieces of dried fruit, such as cranberries or apricots, can provide a sweet and chewy contrast to the creamy cups.
Conclusion
Creating your own Creamy Frozen Yogurt Peanut Butter Cups is not only simple but also a rewarding endeavor that allows you to indulge in a healthier dessert option. The versatility of this recipe means it can be tailored to suit any occasion, from casual family gatherings to elegant dinner parties. With a few easy steps, you can whip up a batch that impresses both in taste and presentation.
The joy of making these cups lies in their customization and the satisfaction of enjoying homemade treats. We encourage you to experiment with different flavors and toppings, making each batch uniquely yours. Enjoy the creativity, relish the deliciousness, and share the joy of these healthier dessert alternatives with friends and family.