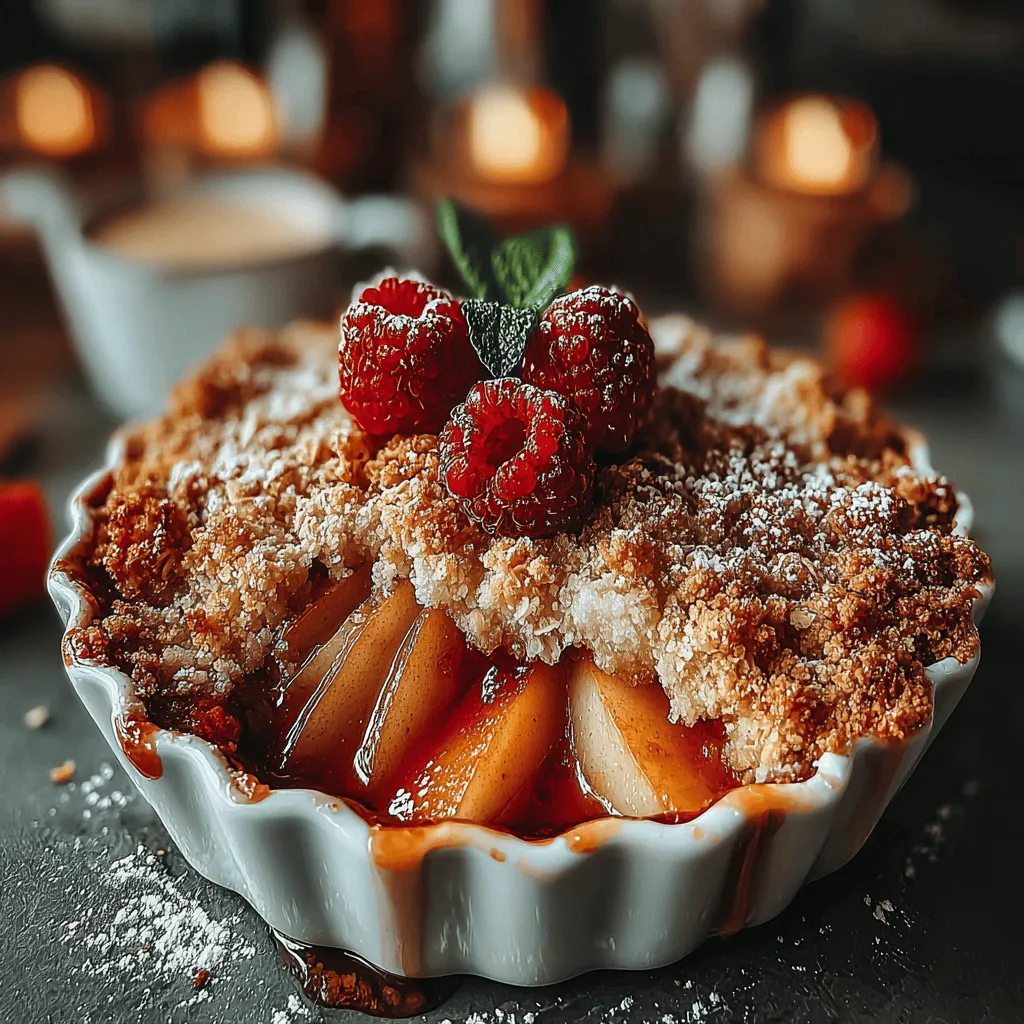
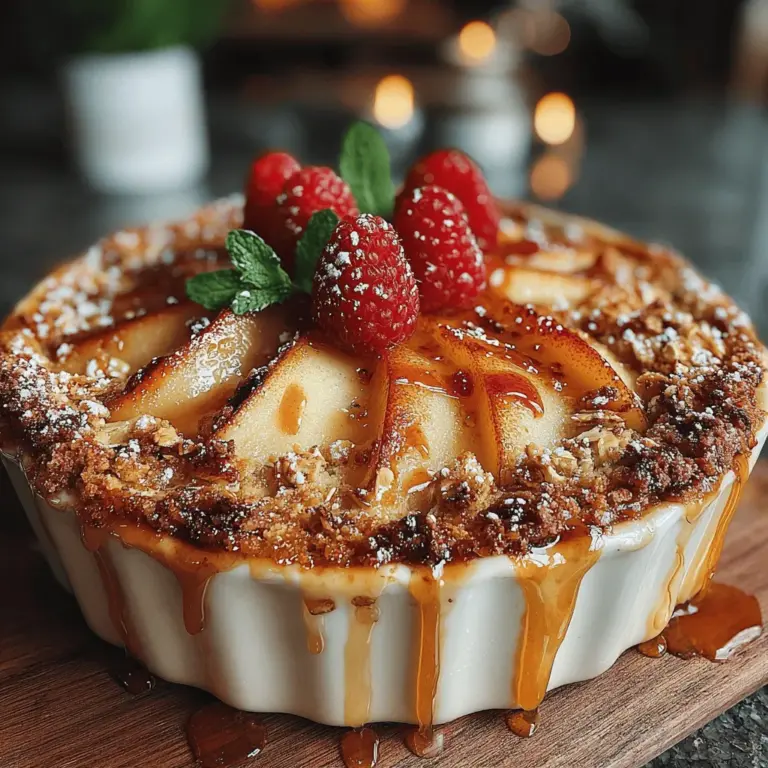
Juicy Pear & Raspberry Cobbler: A Delightful Seasonal Treat
When it comes to desserts that evoke warmth and comfort, few can rival the charm of a homemade cobbler. The Juicy Pear & Raspberry Cobbler is a delightful blend of sweet, tender pears and tart raspberries, creating a perfect marriage of flavors that is sure to please your palate. This dessert not only showcases the best of seasonal fruits but also offers a versatile option that can grace your table for any occasion, from casual weeknight dinners to festive holiday gatherings.
The appeal of this cobbler lies in its ability to spotlight fresh, seasonal ingredients. Pears, with their delicate sweetness and juicy texture, are perfectly complemented by the vibrant tang of raspberries. Together, they create a filling that is both refreshing and indulgent, making it a sought-after dessert for those who appreciate the bounty of nature. As summer transitions into fall, this cobbler serves as a beautiful reminder of the changing seasons, capturing the essence of both summer’s berries and autumn’s pears.
Not only is this Juicy Pear & Raspberry Cobbler a feast for the senses, but it is also remarkably adaptable. Whether you’re hosting a family gathering, planning a cozy dinner with friends, or simply treating yourself after a long day, this dessert fits the bill. Its ease of preparation means that you can whip it up quickly, allowing you to focus on enjoying your time with loved ones rather than spending hours in the kitchen.
Understanding the Ingredients
To create a truly memorable cobbler, understanding your ingredients is crucial. The main components of this recipe are ripe pears, fresh raspberries, sugar, lemon juice, extracts, and oats. Each of these ingredients plays a significant role in crafting the cobbler’s unique flavor and texture.
Ripe Pears and Fresh Raspberries
Starting with the fruit, the choice of pears is critical. Look for ripe, juicy varieties such as Bartlett or Bosc, which provide the right balance of sweetness and moisture. Fresh raspberries are equally essential; their tartness cuts through the sweetness of the pears, creating a harmonious blend that excites the palate. If you can source these fruits locally, you’ll benefit from their peak flavor and freshness.
Enhancing Flavor with Sugar and Lemon Juice
Sugar is not merely a sweetener in this recipe; it acts as a flavor enhancer, drawing out the natural juices from the fruit and creating a luscious filling. A splash of lemon juice adds brightness, balancing the sweetness and elevating the overall taste profile of the cobbler. This combination of sugar and acidity ensures that each bite is bursting with flavor.
The Role of Extracts and Oats
In addition to sugar and lemon juice, extracts like vanilla or almond can be added to deepen the flavor complexity. Almond extract, in particular, pairs beautifully with both pears and raspberries, offering a subtle nuttiness that elevates the dessert.
Oats also play a pivotal role in this recipe, contributing to the delightful texture of the topping. They provide a hearty, rustic element that contrasts beautifully with the soft, juicy fruit beneath. The oats absorb some of the fruit juices during baking, resulting in a topping that is both crispy and chewy.
Preparing the Fruit Filling
Now that you have a good understanding of the ingredients, it’s time to prepare the fruit filling, which is the heart of any cobbler. Follow these step-by-step instructions to ensure your filling is perfectly balanced and bursting with flavor.
1. Peeling and Slicing the Pears: Begin by peeling the ripe pears. A vegetable peeler works best for this task. After peeling, slice them into thin wedges, about 1/4 inch thick. The uniformity of the slices ensures even cooking, which is essential for achieving that melt-in-your-mouth texture.
2. Preparing the Raspberries: Rinse the fresh raspberries gently under cold water, taking care not to crush them. After rinsing, pat them dry with a paper towel. This step helps to remove excess moisture, preventing the filling from becoming too watery during baking.
3. Mixing the Ingredients: In a large mixing bowl, combine the sliced pears and raspberries. Sprinkle the sugar and lemon juice over the fruit, and gently toss them together until the fruit is evenly coated. This step is crucial, as it allows the sugar to begin drawing out the juices from the pears and raspberries, creating a syrupy base for the cobbler.
4. Letting the Fruit Sit: Allow the fruit mixture to sit for about 10 minutes. This resting period is important, as it gives the sugar time to work its magic, releasing the juices from the pears and raspberries. You’ll notice that the mixture becomes slightly syrupy, which will enhance the overall flavor and moisture of the cobbler filling.
5. Coating with Spices: If desired, you can add a pinch of cinnamon or nutmeg to the fruit mixture for an added depth of flavor. Stir gently to ensure that the spices are evenly distributed throughout the fruit.
By following these initial steps, you lay a solid foundation for a delectable cobbler. The sweet and tart filling, enhanced by the natural flavors of the fruits and the addition of sugar and lemon juice, will set the stage for the delicious topping to come.
Crafting the Topping
With the fruit filling prepped, it’s time to turn your attention to the cobbler topping. This is where the magic truly happens, as the topping transforms the fruit into a comforting, baked delight.
1. Combining Dry Ingredients: In a separate mixing bowl, combine the dry ingredients: oats, flour, baking powder, and a pinch of salt. The oats not only add texture but also balance the sweetness of the fruit. The flour acts as a binder, ensuring that the topping holds together while still allowing for a crumbly texture.
2. Incorporating Sugar and Butter: Add sugar to the dry mixture and stir until well-combined. Next, melt some butter and pour it into the dry ingredients. The melted butter is key to achieving a rich, moist topping. It creates a luscious base that blends seamlessly with the oats and flour, giving the cobbler its signature crumbly texture.
3. Adding Extracts: For those who wish to elevate the flavor further, you can incorporate a splash of almond extract at this stage. This addition brings a layer of complexity that perfectly complements the fruit beneath. Mix well until the dry ingredients are fully coated in the buttery mixture.
4. Visualizing the Consistency: The final mixture should resemble wet sand—moist enough to hold together when pressed but still crumbly. If it seems too dry, you can add a touch more melted butter or a splash of milk to achieve the desired consistency.
Assembling the Cobbler
Now that both the fruit filling and topping are prepared, it’s time to assemble the cobbler. Layering is key to ensuring that each bite delivers a delightful combination of fruit and topping.
1. Layering the Fruit: Begin by spreading the prepared fruit filling evenly in a greased baking dish. Make sure to include all the juices, as they will contribute to the overall flavor and moisture of the cobbler.
2. Adding the Topping: Next, spoon the topping mixture over the fruit filling. Aim for an even distribution, allowing some of the fruit to peek through. This will create a beautiful contrast once baked, with bits of juicy fruit visible beneath the golden topping.
3. Ready to Bake: At this point, your cobbler is ready for the oven. Baking at the right temperature will ensure that the topping becomes golden brown and crispy while the fruit filling bubbles underneath, creating a deliciously inviting aroma that fills your kitchen.
By following these steps, you’re well on your way to creating a Juicy Pear & Raspberry Cobbler that will not only impress your guests but also satisfy your own cravings for a perfect dessert. Stay tuned for the next part of this article, where we’ll delve into baking instructions, serving suggestions, and tips for storing leftovers.

Tips for Achieving a Rustic, Charming Appearance
One of the joys of making a cobbler is that its rustic appearance adds to its charm. To achieve that desired look, consider the following tips:
– Use a Variety of Fruit Sizes: When preparing the pears and raspberries, leave some pieces larger and others smaller. This will create a more natural and rustic look in the final dish.
– Crumble Topping: For the topping, rather than spreading it evenly, dollop spoonfuls of the batter over the fruit in a haphazard manner. This allows some fruit to peek through and gives the cobbler a more artisanal appearance.
– Golden Crust: Brush the top of the batter lightly with melted butter before baking. This not only enhances flavor but also encourages a beautifully golden crust.
– Decorative Touch: Sprinkle a little coarse sugar on top before baking for a sparkly, crunchy finish that elevates the presentation.
Suggestions on Baking Dish Sizes and Alternatives
Choosing the right baking dish can make a significant difference in cooking time and the final presentation of your cobbler. Here are some recommendations:
– 9×13-inch Baking Dish: This is the most common size for cobblers and will yield a generous portion, perfect for sharing.
– Individual Ramekins: For a more elegant presentation, consider using individual ramekins. This also makes serving easier, especially for gatherings or potlucks.
– Cast Iron Skillet: A 10-inch cast iron skillet not only provides even heat distribution but also adds a rustic touch to your table. Plus, it retains heat well, keeping your cobbler warm for longer.
– Alternative Baking Dishes: If you don’t have a traditional baking dish, a large pie dish or even a deep oven-safe pan can work. Just be mindful that baking times may vary based on the shape and material of the dish.
Baking the Cobbler
Recommended Oven Temperature and Baking Time
Preheat your oven to 375°F (190°C). This temperature ensures that the cobbler cooks evenly, allowing the fruit to bubble and the topping to become golden and crisp.
Bake the cobbler for approximately 35-45 minutes. The baking time can vary based on your oven and the size of your baking dish.
Signs to Look for to Ensure the Cobbler is Perfectly Baked
To know when your cobbler is perfectly baked, observe the following cues:
– Golden Topping: The top should be a lovely golden brown color. If it looks too pale, it may need a few more minutes.
– Bubbling Fruit: Check for bubbling around the edges of the dish. This is a clear indication that the juices from the pears and raspberries are releasing and merging with the topping.
– Toothpick Test: Insert a toothpick into the topping; it should come out clean or with just a few crumbs attached. If it’s wet or sticky, give it additional time in the oven.
Importance of Letting it Cool Before Serving for Optimal Texture
After baking, allow the cobbler to cool for at least 15-20 minutes before serving. This cooling period is vital as it helps the juices settle, making the cobbler easier to serve and enhancing the overall texture. If served too soon, the filling may be overly runny and difficult to scoop.
Serving Suggestions
Ideas for Pairing the Cobbler with Ice Cream or Whipped Cream
Serving your Juicy Pear & Raspberry Cobbler warm is a delight, especially when paired with a scoop of vanilla ice cream. The creaminess of the ice cream complements the tangy raspberries and sweet pears beautifully.
Alternatively, a dollop of freshly whipped cream can add a light, airy texture and a touch of sweetness. For an added flavor twist, consider infusing your whipped cream with a hint of vanilla or almond extract.
Suggestions for Garnishing
To elevate your cobbler even further, consider these garnishing options:
– Fresh Mint Leaves: A sprig of mint on top adds a pop of color and a refreshing aroma.
– Additional Fruit: Scatter some extra raspberries or thinly sliced pears around the cobbler for a visually appealing presentation.
– Drizzle of Honey or Maple Syrup: For a touch of sweetness, drizzle a little honey or pure maple syrup over the top just before serving.
Discussion on Serving Temperature Preferences
While warm cobbler is the classic choice, some people enjoy it at room temperature. Allowing it to cool slightly can enhance the flavors as they meld together. Consider serving your cobbler warm for a comforting dessert or at room temperature for a more relaxed approach, especially in warmer months.
Nutritional Information
Overview of the Nutritional Benefits of Pears and Raspberries
Both pears and raspberries boast numerous health benefits:
– Pears: Rich in dietary fiber, pears aid digestion and contribute to heart health. They’re also a good source of Vitamin C, which supports the immune system.
– Raspberries: These berries are packed with antioxidants and vitamins. They are low in calories yet high in fiber, making them an excellent choice for a healthy dessert.
Caloric Breakdown Per Serving
A typical serving of Juicy Pear & Raspberry Cobbler (about 1/8 of a 9×13-inch dish) contains approximately:
– Calories: 220
– Carbohydrates: 35g
– Proteins: 2g
– Fats: 9g
– Fiber: 3g
Highlighting the Balance of Carbohydrates, Fats, and Fiber in a Serving
This cobbler strikes a lovely balance between carbohydrates from the fruit and topping, healthy fats from the butter, and fiber from both pears and raspberries. It’s a satisfying dessert that doesn’t overly indulge while still offering a sweet treat.
Storing and Reheating Leftovers
Best Practices for Storing Leftover Cobbler
To ensure your cobbler remains delicious, follow these storage practices:
– Cooling: Allow the cobbler to cool completely after baking before storing. This prevents excess moisture from forming in the storage container.
– Airtight Container: Store leftovers in an airtight container in the refrigerator. This will help maintain freshness and prevent the dessert from absorbing other odors.
Tips for Reheating to Maintain Texture and Flavor
When it’s time to enjoy leftovers, reheating properly is crucial:
– Oven Method: Preheat your oven to 350°F (175°C) and cover the cobbler with foil. Heat for 15-20 minutes until warmed through. This method will preserve the texture of the topping.
– Microwave Method: For a quicker option, use the microwave. Place a slice on a microwave-safe plate and heat for about 30-60 seconds. This method may soften the topping, so it’s best reserved for quick reheats.
Discussion on How Long the Cobbler Lasts in the Refrigerator
When stored correctly, your Juicy Pear & Raspberry Cobbler will last for about 3-4 days in the refrigerator. If you want to keep it for an extended period, consider freezing it instead. Wrap it tightly in plastic wrap and then aluminum foil, and it can last for up to three months in the freezer.
Conclusion
In summary, this Juicy Pear & Raspberry Cobbler is a delightful dessert that captures the essence of seasonal fruits and homemade warmth. Its inviting aroma and comforting flavors make it an ideal dish for gatherings, family dinners, or simply a sweet treat at home.
Embrace the joy of creating and sharing this cobbler with loved ones. The combination of sweet pears and tangy raspberries, topped with a buttery crust, is bound to impress and satisfy. We encourage you to try this recipe and savor the delightful flavors that it brings to your table. Enjoy the satisfaction of homemade desserts this season, and let your culinary creativity shine!


