Introduction to No-Bake Chocolate Coconut Cups
In the realm of desserts, few things are as satisfying as the combination of chocolate and coconut. Our No-Bake Chocolate Coconut Cups bring these two beloved flavors together in a delightful and guilt-free treat that’s perfect for any occasion. The beauty of no-bake desserts lies in their simplicity and speed; they offer a quick way to satisfy your sweet cravings without the need for an oven or extensive cooking skills. This recipe is particularly appealing for busy parents, health-conscious individuals, or anyone who loves to indulge in sweet treats minus the hassle of baking.
These No-Bake Chocolate Coconut Cups are not just a delicious dessert; they are also a nourishing option made with wholesome ingredients. Each cup is packed with healthy fats, fiber, and natural sweetness, making them a perfect snack or dessert that you can feel good about enjoying. Whether you’re preparing for a party, looking for a quick after-school snack, or simply treating yourself, these cups provide a delightful balance of flavors and textures that will please both your palate and your conscience.
Understanding the Ingredients
To create the perfect No-Bake Chocolate Coconut Cups, it’s essential to understand the role of each ingredient in the recipe. Each component not only contributes to the overall flavor but also adds nutritional benefits that elevate this treat beyond traditional sweets.
Almond Flour and Shredded Coconut: The Perfect Base
Almond flour and shredded coconut form the foundation of these delightful cups. Almond flour, made from finely ground almonds, is a fantastic gluten-free alternative to traditional wheat flour. It is rich in healthy fats, protein, and fiber, which can help you feel full and satisfied. Additionally, almond flour has a low glycemic index, making it a smart choice for those monitoring their blood sugar levels.
Shredded coconut, whether sweetened or unsweetened, adds a tropical flair and chewiness to the mixture. It is an excellent source of dietary fiber, which promotes digestive health, as well as medium-chain triglycerides (MCTs), a type of fat that can provide quick energy and support metabolism. The combination of almond flour and shredded coconut not only contributes to the texture of the cups but also imparts a delicious nutty and slightly sweet flavor that pairs perfectly with chocolate.
Sweetening Naturally: Maple Syrup and Honey
One of the highlights of this recipe is the use of natural sweeteners like maple syrup and honey. These alternatives to refined sugars offer a more wholesome way to add sweetness without compromising on flavor. Maple syrup, derived from the sap of sugar maple trees, has a rich flavor profile that can complement the nuttiness of almond flour and the tropical notes of coconut. It also boasts a lower glycemic index than granulated sugar, meaning it won’t spike your blood sugar as dramatically.
Honey, another natural sweetener, is known for its distinct floral notes and natural antioxidants. It has been utilized for centuries not only for its taste but also for its potential health benefits. When combined with chocolate and coconut, these sweeteners enhance the overall flavor while maintaining a wholesome approach to sweetness.
Coconut Oil: A Healthful Fat
Coconut oil is another star ingredient in our No-Bake Chocolate Coconut Cups. This versatile oil is rich in medium-chain triglycerides (MCTs), which can provide a quick source of energy and may even support weight management. Unlike other fats that are stored in the body, MCTs are more easily metabolized and used for energy, making coconut oil a popular choice among health enthusiasts.
In this recipe, coconut oil serves a dual purpose: it helps bind the ingredients together in the base and creates a smooth, luscious chocolate layer when melted. This healthy fat not only enhances the flavor but also contributes to the creamy texture of the dessert, making each bite a rich experience.
Dark Chocolate: The Indulgent Touch
No dessert is complete without chocolate, and for our No-Bake Chocolate Coconut Cups, we recommend using dark chocolate. Dark chocolate is not only delicious but also packed with antioxidants and essential minerals, making it a healthier option compared to milk chocolate. Studies suggest that dark chocolate may offer various health benefits, including improved heart health and reduced inflammation.
For those following a vegan diet, opting for dairy-free dark chocolate is an excellent choice that does not compromise on flavor or texture. The rich, slightly bitter notes of dark chocolate perfectly balance the sweetness of the coconut and the nutty flavor of almond flour, creating a harmonious blend of tastes in every cup.
Preparation Steps for No-Bake Chocolate Coconut Cups
Now that we’ve explored the ingredients, let’s dive into the preparation steps to create these delectable No-Bake Chocolate Coconut Cups. Each stage is straightforward, making this recipe accessible for cooks of all skill levels.
Preparing the Cup Molds
To start, gather your materials. You will need a muffin tin and cupcake liners. Using liners is crucial for easy removal of the cups once they have set. This simple step ensures that your treats maintain their shape and appearance when it’s time to serve. Choose colorful liners to add a festive touch, or go for classic white for a more elegant presentation.
Creating the Coconut Mixture
Next, it’s time to create the coconut mixture. In a mixing bowl, combine almond flour, shredded coconut, coconut oil, and your chosen sweeteners—maple syrup and honey. It’s essential to mix these ingredients thoroughly to achieve a consistent texture. The mixture should be sticky enough to hold together but not overly wet. If it feels too dry, a little extra coconut oil can be added; if it’s too wet, a bit more almond flour or shredded coconut can help achieve the right consistency.
Once combined, the mixture should resemble a thick dough. This is the base that will hold the chocolate layer above, so take your time to ensure all ingredients are well incorporated. Taste the mixture and adjust the sweetness if necessary, keeping in mind that the chocolate layer will add additional flavor.
Forming the Base in the Muffin Tin
With the coconut mixture ready, it’s time to form the base in the muffin tin. Using a spoon or your hands, evenly distribute the mixture into each cupcake liner. Press down firmly to compact the mixture, ensuring a sturdy foundation for the chocolate layer. It’s important to create an even surface, as this will help the chocolate layer sit nicely on top without spilling over.
Take your time with this step; a well-formed base will provide the perfect support for the rich chocolate layer. Once all the cups are filled and compacted, place the muffin tin in the refrigerator for about 15-20 minutes to allow the base to set before adding the chocolate layer.
Melting the Chocolate: Techniques and Tips
While the coconut base sets, it’s time to melt the dark chocolate. You can use a microwave or a double boiler for this step. If you opt for the microwave, place the chocolate in a microwave-safe bowl and heat it in short bursts of 20-30 seconds, stirring in between to prevent burning. If using a double boiler, simmer a small amount of water in a pot and place the chocolate in a heatproof bowl on top, stirring until melted.
Regardless of the method, it’s crucial to melt the chocolate slowly and gently. Once melted, ensure it has a smooth texture, and then remove it from the heat source. Allow the chocolate to cool slightly before pouring it over the set coconut bases. This helps prevent the warm chocolate from melting the coconut layer beneath it.
With these steps, you are well on your way to creating delightful No-Bake Chocolate Coconut Cups that are not only delicious but also packed with nutritional benefits. Stay tuned for the next part, where we’ll cover the final assembly and presentation of these irresistible treats.
Melting Chocolate: Achieving the Perfect Finish
When it comes to creating delicious No-Bake Chocolate Coconut Cups, the chocolate layer is essential for both flavor and appearance. There are two primary methods for melting chocolate: the microwave method and the double boiler method. Each has its pros and cons, but both can yield smooth, glossy chocolate that will elevate your dessert.
Method 1: Microwave Melting
1. Choose Your Chocolate: Use high-quality chocolate chips or chocolate bars for the best flavor. Dark chocolate works wonderfully for this recipe, but feel free to use milk or white chocolate depending on your preference.
2. Microwave Instructions:
– Place the chocolate in a microwave-safe bowl.
– Heat in 30-second intervals, stirring after each interval to ensure even melting.
– Continue until the chocolate is smooth and fully melted, typically taking about 1-2 minutes total.
– Be cautious not to overheat, as this can cause the chocolate to seize.
Method 2: Double Boiler Melting
1. Set Up Your Double Boiler: If you prefer a more controlled melting process, a double boiler is an excellent choice.
– Fill a saucepan with a few inches of water and bring it to a simmer.
– Place a heatproof bowl over the saucepan, ensuring it doesn’t touch the water.
2. Melt the Chocolate:
– Add your chocolate to the bowl and stir occasionally as it melts.
– This method allows for gentle heating and minimizes the risk of scorching the chocolate, resulting in a beautiful, glossy finish.
Regardless of the method you choose, the goal is to achieve a smooth and silky chocolate that will coat your coconut base flawlessly.
Assembling the Cups: Layering for Flavor
Once your chocolate is melted, it’s time to assemble your No-Bake Chocolate Coconut Cups. This process involves layering chocolate and coconut for maximum flavor and visual appeal.
1. Prepare the Coconut Base: In your prepared muffin tin or silicone mold, spoon an even layer of the coconut mixture into the bottom of each cup. Press down firmly to ensure a compact base that will hold together when set.
2. Add the Chocolate Layer:
– Using a spoon or a small ladle, pour a layer of melted chocolate over the coconut base. Aim for an even distribution to ensure every cup has that delightful chocolatey goodness.
– Use the back of the spoon to spread the chocolate if necessary, covering the coconut mixture completely.
3. Repeat the Layers: Depending on how indulgent you want your cups to be, you can add a second layer of coconut followed by another layer of chocolate. This creates a delightful contrast of flavors and textures.
4. Final Chocolate Layer: If you’re opting for a second layer, finish with a final pour of chocolate on top, ensuring it covers all the layers and seals in the coconut.
By carefully layering your ingredients, you can create a visually stunning and delicious treat that is sure to impress.
Chilling and Setting: The Key to Perfection
Once your cups are assembled, the next step is chilling. This crucial phase allows the chocolate to set properly, which is vital for achieving the perfect texture when served.
1. Chill Time: Place the assembled cups in the refrigerator for at least 30 minutes. This will allow the chocolate to harden and the flavors to meld beautifully.
2. Check for Firmness: After 30 minutes, check the cups. The chocolate should be firm to the touch. If it’s still soft, give it an additional 10-15 minutes in the fridge.
3. Serve Immediately or Store: Once set, you can enjoy the cups right away, or store them for later. Proper chilling ensures they maintain their shape and deliciousness, making them perfect for any occasion.
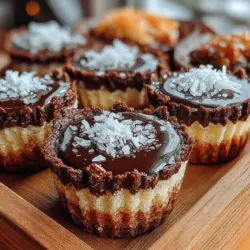
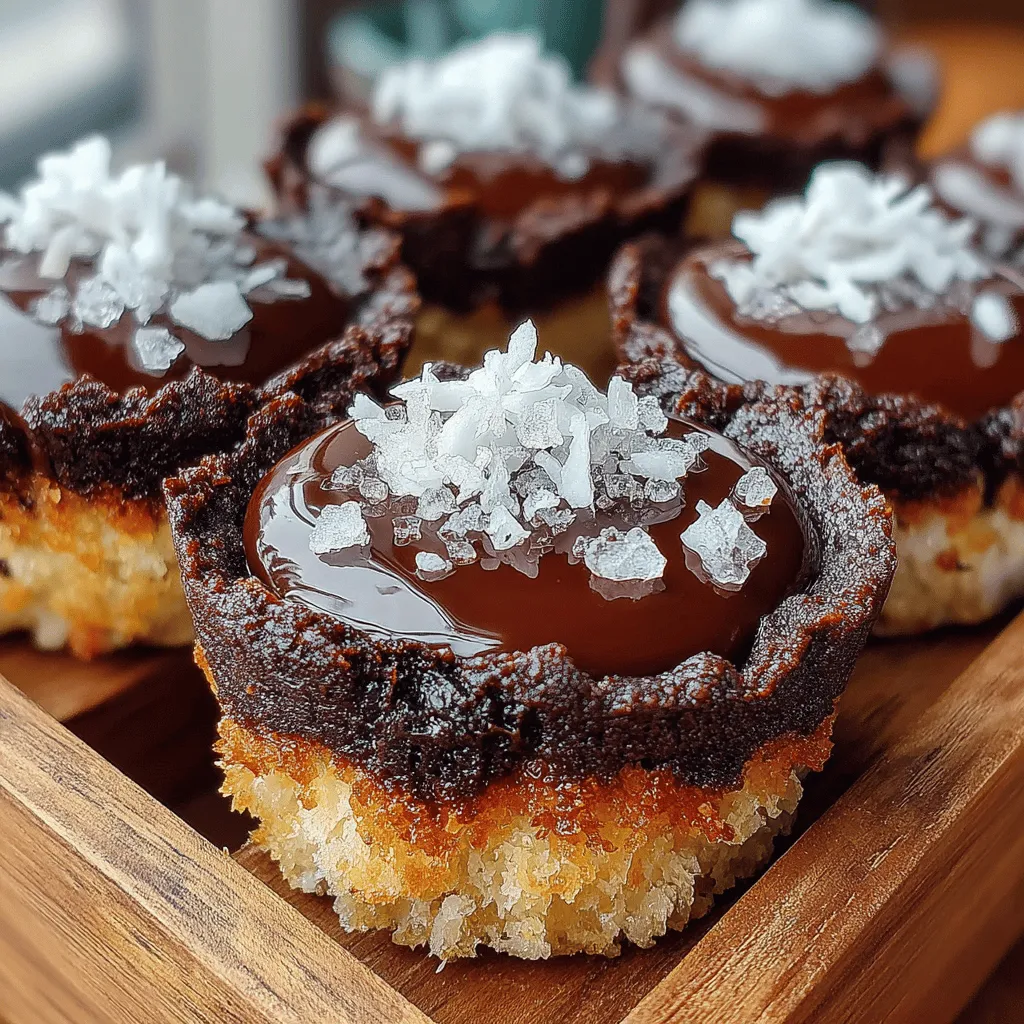
Finishing Touches: Garnishing with Flaky Sea Salt
To elevate your No-Bake Chocolate Coconut Cups even further, consider adding a sprinkle of flaky sea salt as a finishing touch. This simple addition can enhance the flavor profile and create a delightful contrast with the sweetness of the chocolate and coconut.
1. Add Flaky Sea Salt: After pouring the final layer of chocolate, sprinkle a small pinch of flaky sea salt on top of each cup while the chocolate is still wet. This allows the salt to adhere properly and will create a wonderful flavor combination.
2. Visual Appeal: The contrast of the dark chocolate with the white sea salt not only enhances the taste but also adds a beautiful touch to your presentation, making these cups look even more enticing.
Storage and Serving Suggestions
Storing Your No-Bake Chocolate Coconut Cups
To keep your No-Bake Chocolate Coconut Cups fresh, follow these storage tips:
1. Use Airtight Containers: Place the cups in an airtight container to prevent them from absorbing any odors from the refrigerator. This will help maintain their flavor and texture.
2. Ideal Temperature: Store the cups in the refrigerator, where they will stay fresh for up to one week. If you prefer to keep them longer, they can also be frozen for up to three months.
3. Thawing: If you freeze the cups, allow them to thaw in the refrigerator for a few hours before serving to ensure they maintain their texture.
Serving Ideas for Various Occasions
These No-Bake Chocolate Coconut Cups are incredibly versatile and can be served in various settings:
1. Casual Snacking: Enjoy them as a healthy snack during the day. Their rich flavor will satisfy your sweet cravings without the guilt.
2. Party Treats: Arrange the cups on a platter for your next gathering or celebration. Their elegant appearance will impress your guests, and they can be the highlight of a dessert table.
3. Gift Them: Package the cups in decorative boxes or jars and give them as gifts. They make for thoughtful, homemade treats for friends and family.
Nutritional Information and Benefits
Health Benefits of No-Bake Chocolate Coconut Cups
These delightful cups not only taste great but also offer several health benefits:
1. Nutrient-Rich Ingredients: The combination of coconut and chocolate provides healthy fats, fiber, and antioxidants. Coconut is rich in medium-chain triglycerides (MCTs), which may aid in weight management.
2. Balanced Macronutrients: Each cup contains a balance of carbohydrates, fats, and proteins, making them a satisfying snack that can help stabilize blood sugar levels.
3. Energy Boosting: The natural sugars in the coconut and chocolate can provide a quick energy boost, making them a perfect pre-workout snack.
Vegan and Gluten-Free Options
One of the best aspects of this recipe is its versatility:
1. Vegan-Friendly: The No-Bake Chocolate Coconut Cups can easily be made vegan by choosing dairy-free chocolate and ensuring that your sweeteners are plant-based.
2. Gluten-Free: This recipe is naturally gluten-free, making it suitable for those with gluten sensitivities or celiac disease. Enjoy these cups worry-free!
Conclusion: Savoring the Guilt-Free Indulgence
Creating No-Bake Chocolate Coconut Cups is not just about satisfying your sweet tooth; it’s about enjoying a guilt-free indulgence that aligns with your health goals. These cups are simple to make, incredibly delicious, and can be tailored to fit various dietary preferences without sacrificing flavor.
Whether you’re snacking on them by yourself, sharing them at a gathering, or giving them as gifts, these cups are sure to bring joy to any occasion. Experiment with different variations, such as adding nuts, dried fruits, or spices, to personalize your treats even further.
Indulge in the delightful world of No-Bake Chocolate Coconut Cups, where healthy eating meets delicious flavors. Enjoy every bite and celebrate the joy of creating a treat that you can feel good about!